There’s NO “One-Size-Fits-All” when it comes to choosing a file.
(Let me break it down for ya:)
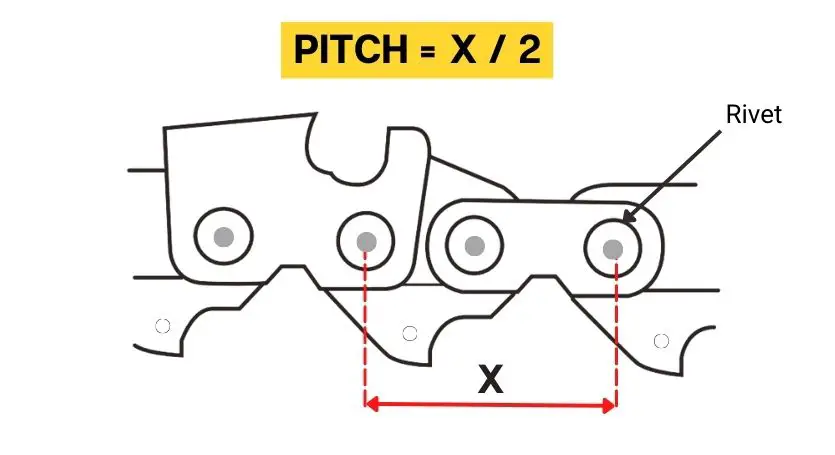
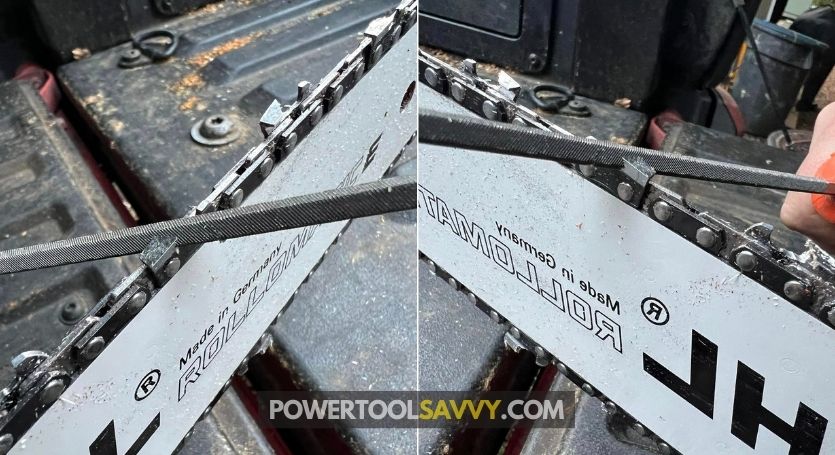
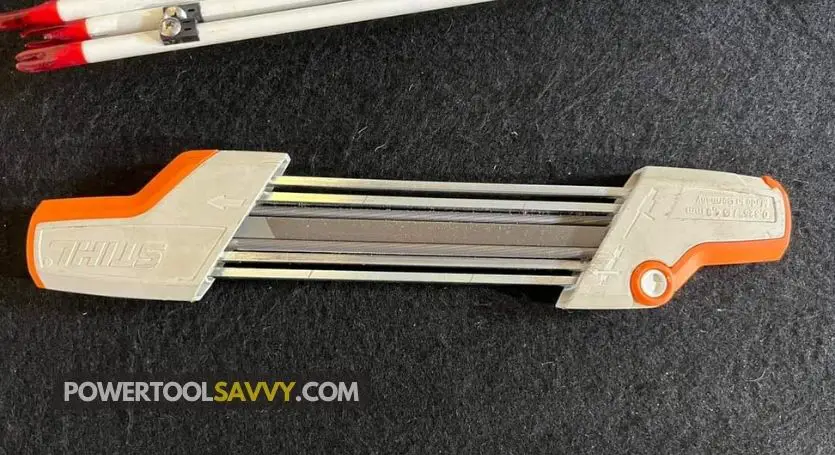
Chainsaw chains are available in different pitch (it’s the distance between three consecutive rivets divided by two) sizes. There are 4 common pitch sizes: 1/4″, .325″, 3/8″, and .404″.
To effectively sharpen your saw chain, you need to choose the right file that matches the pitch of your chain. Else, you won’t be able to give your chain the sharpness it deserves.
Here’s a table to help you out: 👇
Chain Pitch
Round File Diameter
1/4"
4.4 mm
.325"
4.8 mm
3/8"
5.2 mm
.404"
5.5 mm
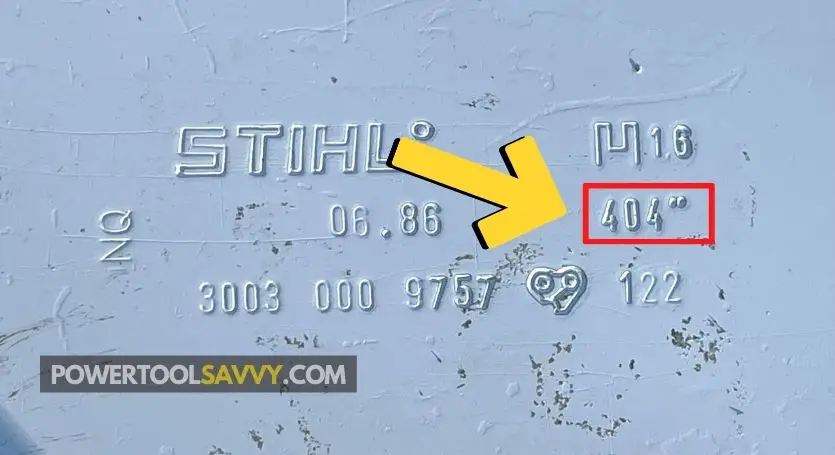
Got NO clue about your chain’s pitch?
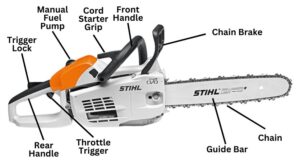
No worries, just take a peek at the markings on your saw’s guide bar or give the user manual a quick read.
2. Using a Dull File
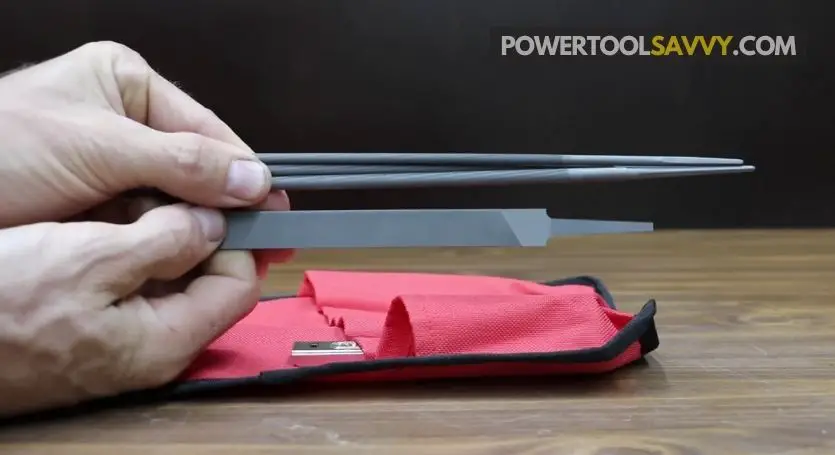
Absolutely, chainsaw files do lose their sharpness over time!
And when they’re dull, they just can’t get the job done right. Even if they manage to, it’ll be a slow process, and you won’t be able to get the sharpness you want.
That’s not all!
Using a dull file can also make your chain even duller (or, worst-case scenario, it might get your chain ripped right off!).
So, it’s important to use a SHARP file that can efficiently sharpen your chain. And when it starts to lose its edge, make sure to SWAP it out for a FRESH NEW one.
Here’s what Ward Litwiller, one of our Facebook community members, had to say: 👇
But how can you tell if your file has gone dull?
Well, it’s actually quite SIMPLE!
Here are 3 symptoms of a dull chainsaw file: 👇
You need to put more pressure when filing,
It’s taking longer to achieve the results you used to get,
The file slips or skates when stroked along the chain.
3. Not Bringing Down the Rakers
Can I be totally honest with you??
When I was first learning how to sharpen a chainsaw chain, I used to make this mistake quite often.
Even today, I notice newbie chainsawers making this same mistake.
But why is that so important??
Well, here’s what you need to know: 👇
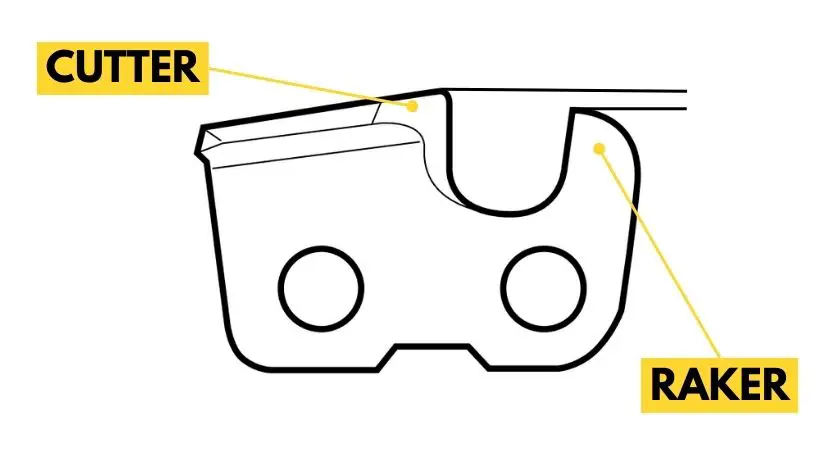
The rakers (also known as the “depth gauges“) on your chainsaw chain are the teeth that determine how deep the cutting teeth will bite into the wood.
Each cutter is accompanied by a corresponding raker located right in front of it.
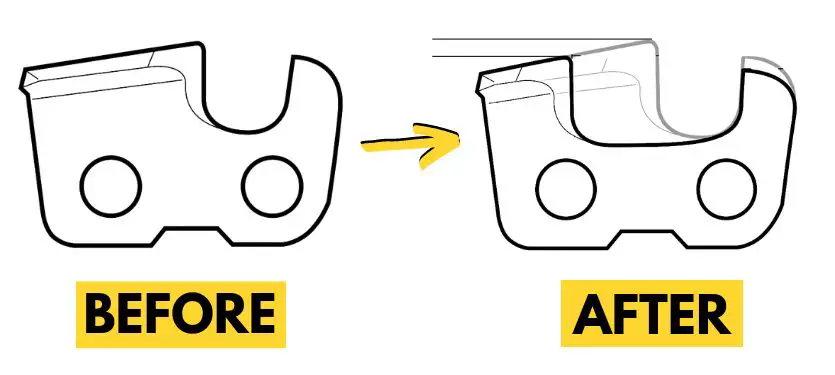
As you grind your chain, the cutting teeth become SHORTER.
Or, in other words, those rakers get taller, which means there’s less clearance for the cutting teeth to cut into the wood.
And if you don’t file the rakers down after each sharpening session, the chain will start to cut less effectively, even if the teeth are razor-sharp.
So, always make sure to bring those rakers down!
4. Filing Down the Rakers Way Too Much
As they say, “Too much of a good thing is a BAD thing!”
The SAME goes here.
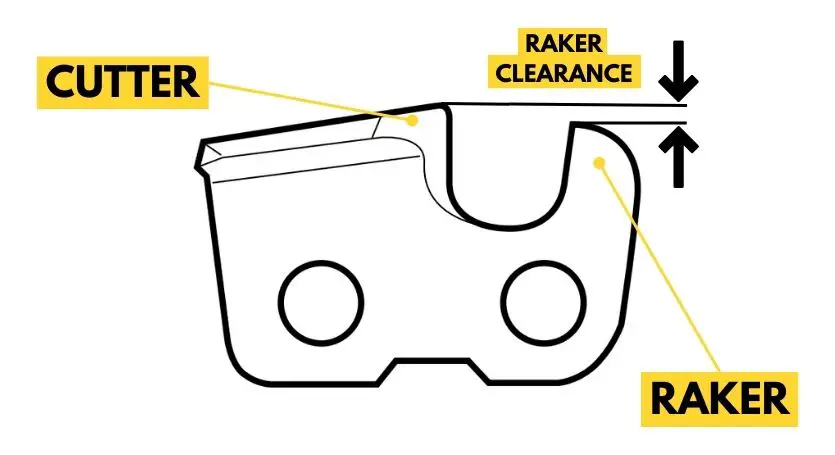
The height difference between a cutting tooth and a raker is called “raker clearance“, which determines how much wood the tooth grabs in one bite.
You might assume that – “the more raker clearance you have – the faster the chain will cut.”
But that’s NOT true at all!
Excessive raker clearance puts additional strain on the chain, produces more heat, and shortens the chain’s lifespan. It may also get your saw pinched, bogged down, and even result in a potential kickback.
So, what’s the ideal raker clearance you should aim for?
The generally recommended raker clearance falls in the range of 0.025-0.030 inches. Stick to that range and avoid over-filing the rakers.
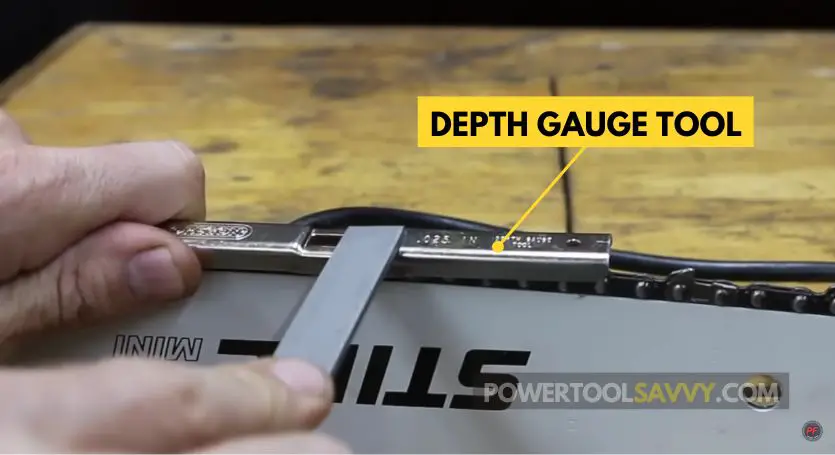
I use a depth gauge to get the RIGHT clearance for my chains.
5. Sharpening The Chain Unevenly
One mistake I often see people make is – sharpening one side of their chain more than the other.
To be honest:
It happens even to the most experienced chainsaw enthusiasts! 🐸
Because when sharpening a chain manually, it gets quite challenging to consistently maintain the same level of pressure, angle, and stroke on both sides.
For example, I personally find it easier to sharpen the right side teeth of my chain, but when it comes to the left side teeth, I tend to use a lighter touch.
That’s why it’s important to make sure that both sides of your chain are sharpened equally before you get to work.
I’d suggest adding 3-4 extra strokes to your weaker side to even out the sharpness.
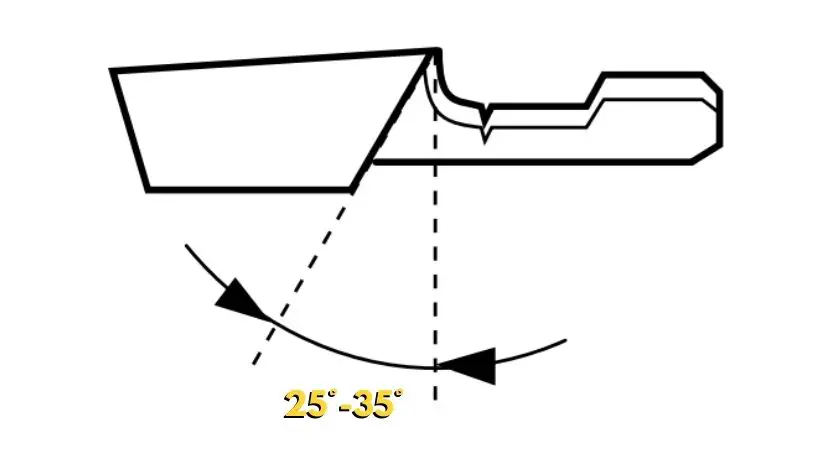
6. Wrong Sharpening Angle
Another BIG mistake to watch out for while sharpening your chain.
A WRONG sharpening angle could damage the chain and reduce its efficiency. This translates to requiring more time and effort to cut through a log.
So, what’s the right angle?
In most cases, the ideal sharpening angle will be between 25° and 35°. The tougher the wood, the higher the angle you should aim for.
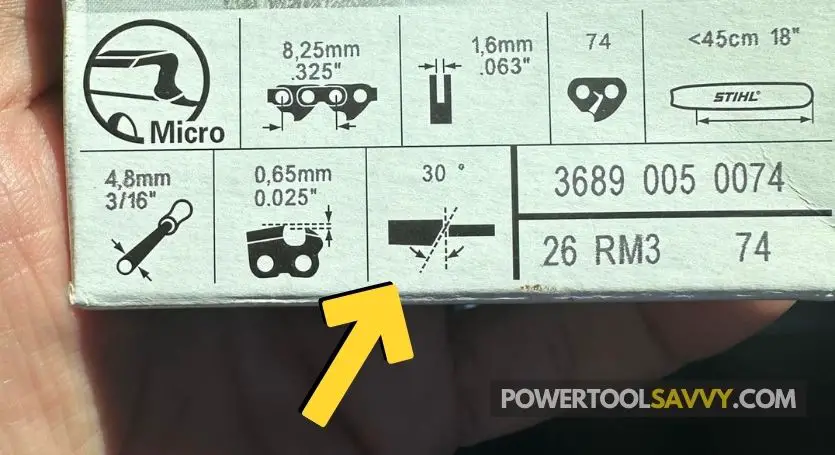
However, if you’re just starting out, I’d strongly recommend sticking to the angle suggested by the manufacturer, which is typically specified in the user manual.
If it’s not a STOCK chain, check the package. You should find the ideal sharpening angle for the specific chain you have.
(Here’s an example: 👇)
PRO TIP: If you’re having trouble maintaining a consistent angle throughout the job, a sharpening guide can come in handy.
7. Filing Backwards
Wanna hear a CRAZY fact??
Chainsaw chain sharpening files only sharpen on the forward stroke. Filing backward or making reverse strokes can ruin the cutting teeth.
So, if you’re someone who tends to file in both directions, you need to STOP!
Lift the file off the cutter on the backstroke and maintain a consistent motion with the forward stroke.
Long story short, file like you’re shooting a pool ball. (Now that’s a SKILL!)
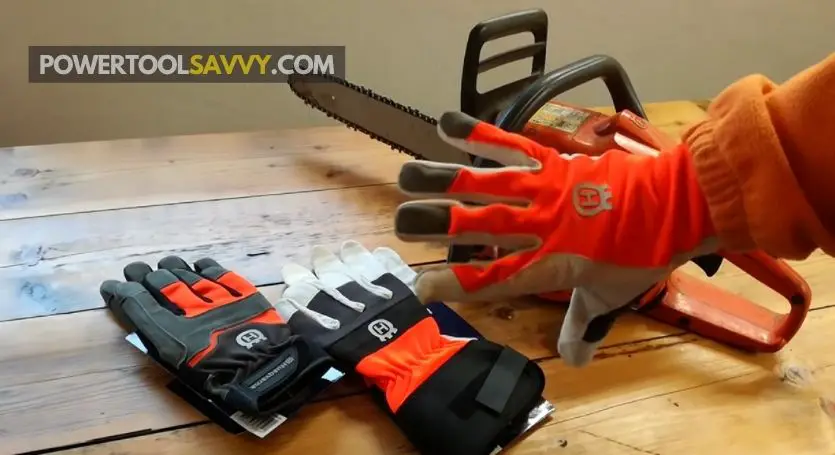
8. Not Wearing Gloves
Are you SUPERMAN??
No?
Well, then it’s a GOOD idea to wear those gloves while sharpening your chain.
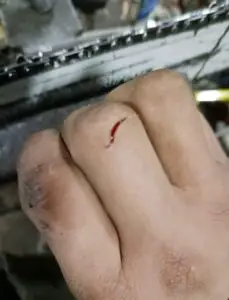
Chainsaw chains come with incredibly SHARP cutters. Even the dull ones can pose a DANGER! ☠️
On top of it, when you get into the rhythm, it’s quite EASY to forget about safety.
A few days back, I was sharpening my chainsaw without gloves, and I ended up nicking my finger! 🤕
The bottom line?
ALWAYS wear those gloves when you’re dealing with a chainsaw. It’ll keep you safe and make the sharpening process a breeze.
Trust me, it’s not worth taking a risk for the sake of saving a few extra minutes.
Plus, you’ll look pretty BADASS in a pair of leather gloves! 😉
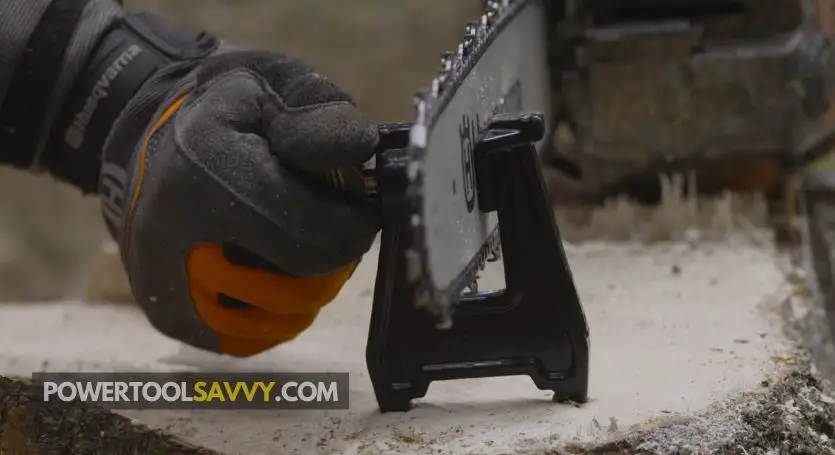
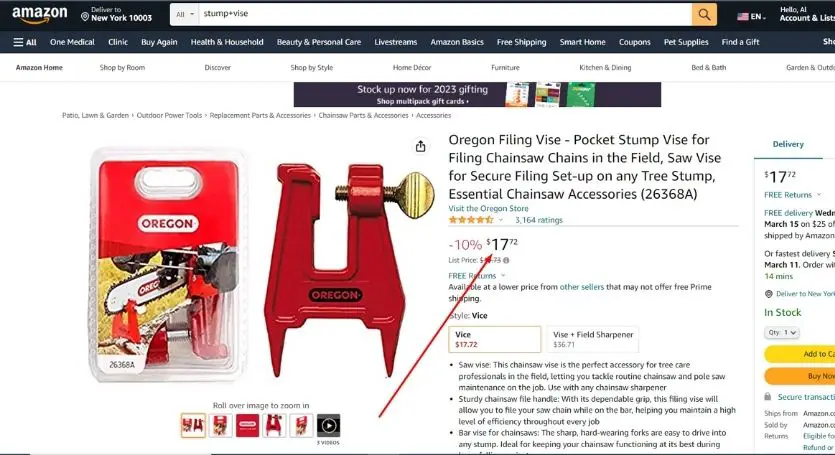
9. Not Using a Vise
I wouldn’t say a TON of chainsawers make this mistake, but it’s common enough to talk about!
Not using a vise is like chopping down a tree with one hand tied behind your back.
A vise is a great way to secure your chainsaw while you’re grinding the chain. It makes the job a lot safer and EASIER!
Plus, it prevents your saw from slipping and potentially hurting you during the process.
So, always brace your saw with a vise while sharpening.
If you’ve got a bench vise, great!
If not, pick up a stump vise at your local hardware store or find one on Amazon. They’re handy and relatively cheaper (usually under $20).
10. Failing to Identify a Dull Chain
LAST but not least!
Many chainsaw users out there don’t quite catch on when their trusty chain has lost its edge and is begging for a sharpening session.
They just keep on using the same dull chain week after week, often without even realizing it.
And guess what!
This can lead to inefficient cutting results, as well as cause serious damage to the saw.
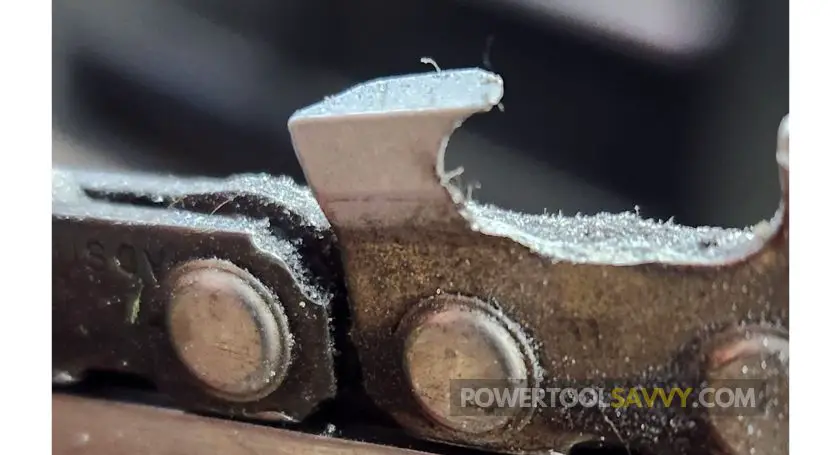
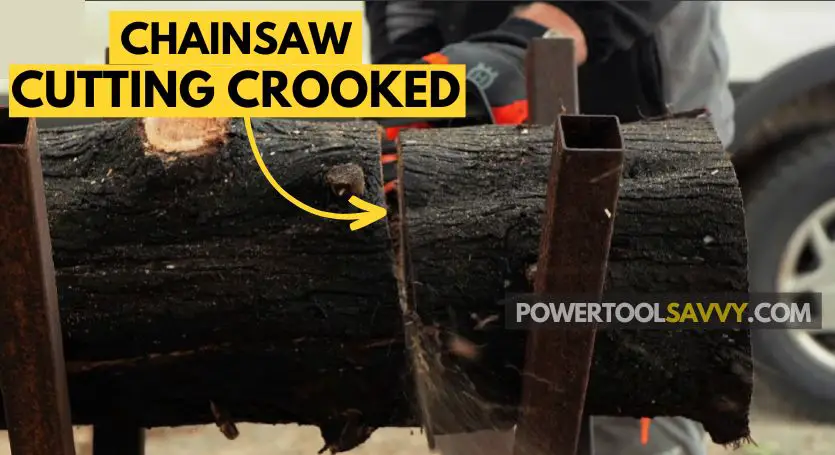
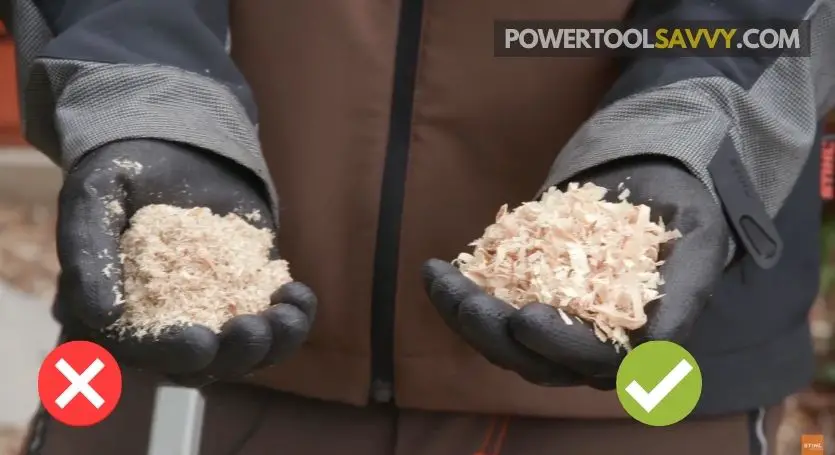
Here are 5 signs that your chain is dull: 👇
Your saw produces fine sawdust instead of wood chips (check the image below),
Your saw doesn’t pull itself into the wood,
Your saw vibrates abnormally,
Your saw cuts crooked,
Your saw starts to smoke while cutting.
If you NOTICE any of these signs, it would be wise to give your chain a check-up!
Hey there! My name is Sam, and I'm the NERD behind this site. I'm an avid chainsaw enthusiast, and I've been tinkering with them since I was 17 (it's almost 20 years now!).


Pingback: How Much Does It Cost to Sharpen a Chainsaw Chain?